


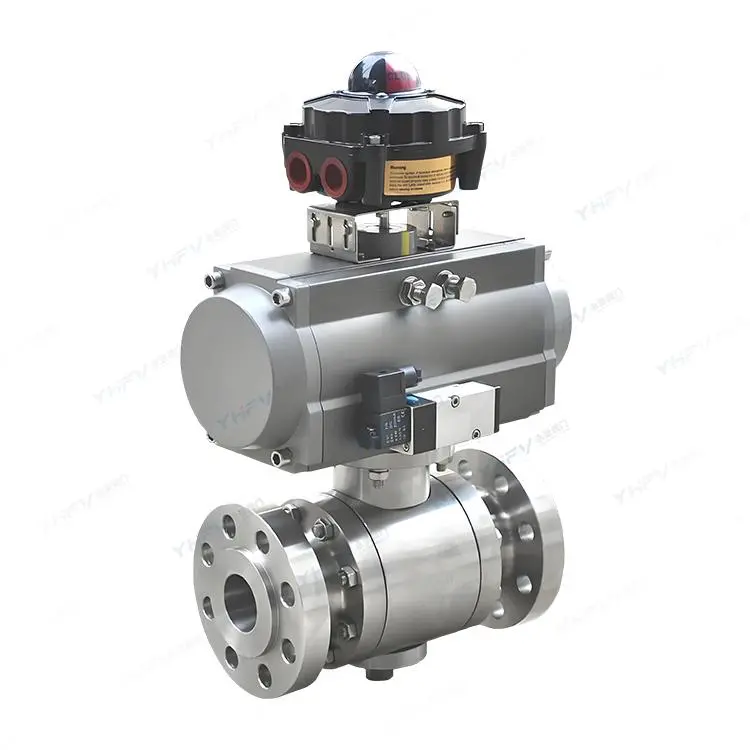
Stainless steel ball valves are widely used in the petroleum, chemical, and power industries due to their high strength and resistance to high temperatures and pressures. Correct installation and maintenance are crucial for ensuring their long-term stable operation. The following details the precautions from the aspects of installation and maintenance.
I. Preparations before installation
1. Pipeline cleaning and alignment
The upstream and downstream pipelines must be coaxial, and the sealing surfaces of the two flanges should be parallel. The pipeline must be able to bear the weight of the ball valve; otherwise, appropriate support devices must be installed on the pipeline. Before installation, thoroughly clean the pipelines and remove oil, welding slag, and all impurities from the pipeline.
2. Valve inspection and confirmation
Check the nameplate on the ball valve to confirm that the model, pressure rating, and material are consistent with the design requirements. Check the valve body for any obvious damage, corrosion, or deformation, and open and close the valve several times to confirm that it operates flexibly and works normally. Remove the protective covers on the connecting flanges of the ball valve and inspect the valve holes and remove any possible contaminants.
3. Seal inspection
Even a tiny foreign particle between the valve seat and the ball can damage the valve seat sealing surface. Therefore, before installation, carefully inspect and clean the sealing area.
II. Key points during installation
1. Installation location and direction
The ball valve can be installed at either the upstream or downstream end. Hand-operated ball valves can be installed at any position on the pipeline; however, ball valves with gearboxes or pneumatic actuators must be installed upright, that is, on a horizontal pipeline with the drive device above the pipeline. Ensure there is sufficient space around the valve to allow the operating lever or handwheel to move freely without interference.
2. Requirements for flange connection
The flange of the valve and the pipeline flange must be equipped with appropriate sealing gaskets according to the pipeline design requirements. The bolts on the flange must be tightened symmetrically, gradually, and evenly, and cross-locking with the specified torque must be used to avoid leakage or deformation due to uneven force.
3. Connection of drive device
If an air or electric actuator is used, connect the air pipeline or electrical lines as required to ensure reliable power supply and control signals. After installing the actuator, input the corresponding signals to test the operation of the valve to confirm that it can be opened and closed normally.
III. Inspection after installation
Operate the drive device to open and close the ball valve several times; it should be flexible without sticking. According to the pipeline design requirements, inspect the sealing performance of the flange joint between the pipeline and the ball valve, and if necessary, conduct a pressure test to ensure no leakage.
Maintenance precautions for stainless steel ball valves
I. Daily inspection and maintenance
1. Visual and operational inspection
Regularly check the surface of the ball valve for corrosion, deformation, or damage; manually operate to check if the switch is flexible, and for any jamming or sticking; check the connection of the actuator power line and control line for firmness.
2. Sealing performance inspection
After closing the ball valve, apply pressure on one side and observe if there is leakage on the other side. Minor leakage can be addressed by slightly tightening the valve stem nut (note: do not over-tighten; usually, lock it 1/4 to 1 turn); if the leakage is severe, replace the seal.
3. Packing and valve seat inspection
Regularly inspect for leakage at the packing area and check for wear, scratches, or deformation of the valve seat. Address any issues promptly or replace them.
II. Regular cleaning and maintenance
1. External cleaning
Use a clean soft cloth to wipe the exterior of the ball valve to remove dust, dirt, and oil.
2. Internal cleaning
Clean the interior regularly based on the medium and operating conditions. Cleaning agents must be compatible with the rubber parts, plastic parts, metal parts, and working medium. For gas-based working medium, gasoline can be used to clean metal parts; for non-metal parts, use pure water or alcohol for cleaning, and remove from the cleaning agent immediately to avoid prolonged soaking.
3. Cleaning methods
The individual parts that have been disassembled can be cleaned by immersion; for the metal parts that have not been disassembled, they can be wiped clean with a clean cloth impregnated with cleaning agent (avoiding the fibers from adhering to the parts). During the cleaning process, all grease, dirt, accumulated glue, and dust on the surface of the parts must be removed. After cleaning, the parts can be assembled only after the cleaning agent has completely evaporated, and they must not be left for a long time to avoid rusting or being contaminated by dust.
III. Lubrication and Maintenance
1. Selection of Lubricating Grease
The lubricating grease must be compatible with the metal materials of the ball valve, rubber parts, plastic parts, and the working medium. When the working medium is gas, special lubricating greases such as T221 can be used.
2. Lubrication Areas and Methods
Apply a thin layer of lubricating grease on the surface of the sealing element installation groove, a thin layer on the rubber sealing element, and a thin layer on the sealing surface and friction surface of the valve stem. Also, apply an appropriate amount of lubricating grease on the valve stem threads to reduce friction and prevent jamming, but do not apply too much to avoid contaminating the medium.
3. Grease Injection Maintenance
The sealing system of the forged steel ball valve mostly adopts an enhanced polytetrafluoroethylene insert with stainless steel rings. During maintenance, the injection amount must be precisely controlled. Insufficient injection will cause the sealing surface to wear out due to lack of lubrication, while excessive injection will result in waste. The sealing capacity should be calculated based on the valve size and category and injected reasonably. After injection, the grease injection port must be sealed to prevent impurities from entering or the grease from oxidizing. The sealing cover should be coated with anti-rust grease.
IV. Safety Guidelines for Maintenance Operations
1. Pressure Relief Before Maintenance
Before disassembling and disassembling the ball valve, it is necessary to confirm that the upstream and downstream pipelines have been relieved of pressure. Only then can the disassembly and disassembly operation be carried out. When the ball valve is in the closed state, there is still pressurized fluid inside the valve body, and this must not be ignored.
2. Disconnect Power Supply or Gas Supply
Before maintenance, disconnect the power supply or gas supply and separate the actuator from the bracket.
3. Protect the Sealing Surface
During disassembly and reassembly, be careful to prevent damage to the sealing surface of the parts, especially non-metallic parts. When removing the O-ring, use a dedicated tool and do not forcibly pry it with metal tools.
4. Prevent Foreign Matter Contamination
During assembly, no metal debris, fibers, grease (except those specified), dust, or other impurities should adhere to the surface of the parts or enter the internal cavity. New parts must also be cleaned before assembly.
V. Key Points for Fault Handling
1. Internal Leakage Handling
It may be caused by damaged sealing elements, worn valve seats, or scratches on the ball surface. Check the sealing elements and valve seats and replace them in time. For surface problems of the ball, grinding or replacement may be necessary.
2. External Leakage Handling
Usually, it is caused by packing leakage, loose flange connection, or valve body cracks. Packing leakage can be tightened the packing cover or replaced; flange bolts need to be uniformly tightened according to the specified torque; valve body cracks require replacement of the entire valve.
3. Jamming Handling
When suddenly jammed during operation, do not forcibly operate. Cut off the power supply and medium source first, and check if there is any foreign matter blocking or damaged parts inside.
4. Actuator Failure
Check the electrical connection for normality; if the electrical connection is normal, it may be due to damage to the internal mechanical components. Disassemble and repair or replace the actuator.
VI. Storage and Long-Term Maintenance
1. Storage Requirements
When storing for a long time, wrap it with plastic film or oil paper, install a sealing plug or flange cover at the inlet and outlet to protect the sealing surface. The storage environment should be dry and ventilated, avoiding direct sunlight and rain, with a temperature maintained between -25℃ and 70℃, and a relative humidity not exceeding 80%.
2. Regular Inspection
During storage, regularly inspect for rust or damage, and manually operate to confirm normal rotation. If any problems are found, they should be dealt with promptly.
3. Record Keeping and Training
After each maintenance, record the maintenance log, including the time, content, and replaced parts. Maintenance personnel must undergo professional training to understand the valve structure and maintenance methods to ensure safe and efficient operation.